Author: Josh Steinhauer-Li

  • Adding Controller support to my Unity Game’s UI

    Adding Controller support to my Unity Game’s UI

    Adding controller support to a game that was not designed for it in mind can be challenging. For me, the easy part was to get the actual gameplay working. The part that took many weeks was updating my menus and UI to fully support the controller. Here’s some tips and tricks on how to make this transition as smooth as possible.

    Quick Wheel

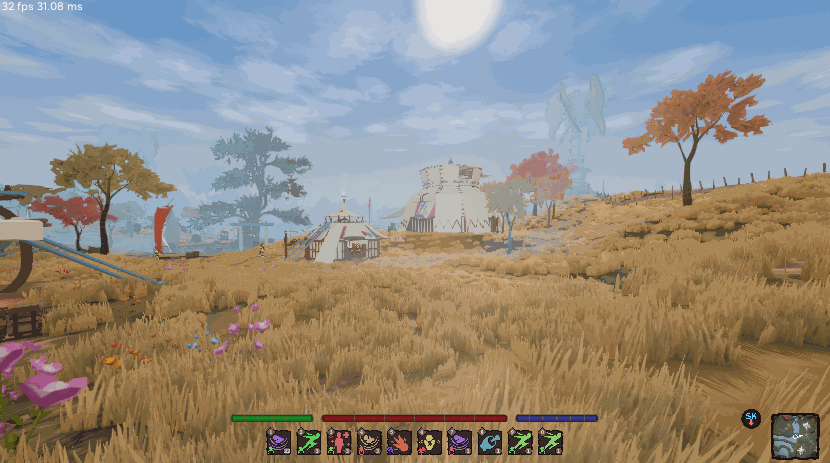
    Ardenfall’s quickslot system relies on pressing keys 0-9, so I added a quick wheel that works both on controller and keyboard.

    Quick Wheel with Controller

    I also added a button on the controller assigned to the first quickslot element by default. This shows up on the quick wheel and the quickslot bar. (Later I plan on adding support to hide that quickslot bar when using controller, at least by default).

    Quick Wheel with Keyboard

    It’s actually quite an improvement for keyboard users – moving your hand to the ‘9’ key is no fun, but holding G and clicking? Fast! I made sure to make the mouse position automatically above the top item.

    Adding/Removing Items with Quickwheel

    UI Selection

    If you’ve stuck to Keyboard and Mouse in your Unity development journey, then you probably have little knowledge on the concept of “UI Selection”. A selected UI element can be ‘Submitted’ by the controller or keyboard (ie pressing ‘X’ on a PS5 controller to ‘submit’ a button), and navigated to other elements.

    This is the key thing to remember: You (almost) always need to have a UI element selection at all times. If you expect the user to be navigating a menu, then you need a selection. No selection means no navigation, no clicking, nothing.

    Auto Selection

    I made a component called ‘Auto Selection’ that simply set the current selection to itself on enable. I also included a toggle that only does this when there is no active selection.

    I placed this component wherever I wanted the initial selection to be in menus. Usually the top element.

    Sometimes I couldn’t rely on this, and would need to have special code select elements on enable / menu creation.

    Hovering / Selection

    Supporting both mouse + keyboard and controller introduces a complication: the user can use the mouse to click somewhere, deselecting the current element, and then switch to controller, finding themselves without a selected object. Also, hovering and selecting are two separate things in Unity, meaning you can hover over stuff, but the controller is still selecting something else!

    The first thing I did was make sure that hovering and selecting are one and the same. I made a component that ensures whenever the element is hovered over, it also selects it. I also of course ensured all buttons swap their texture when selected (and therefore hovered).

    Hover and Selection become the same thing in ardenfall land

    Selection Fallback

    In the case of items being deselected, (most commonly due to the mouse clicking somewhere then switching back to controller) each menu also has a fallback method to select an object again.

    By default, the menu will keep track of the last selected object, and if there is no selection, it will simply reselect that previous object (assuming it is enabled in the hierarchy). In the case that the previous selection is destroyed or disabled, it will fallback again to select a predefined object.

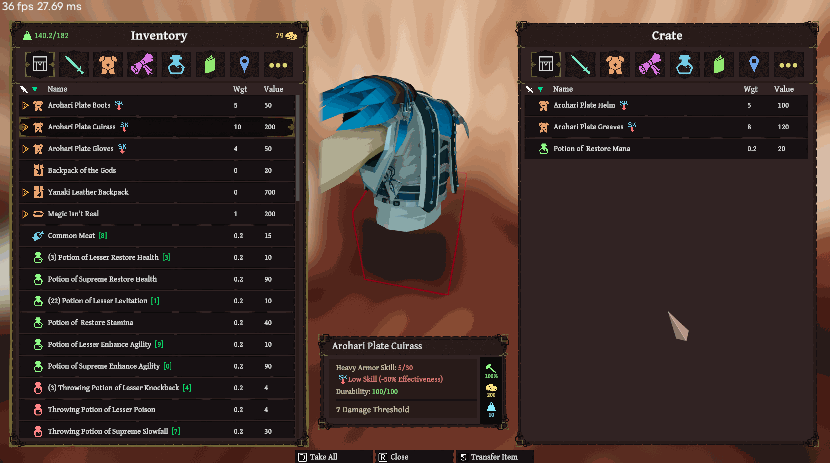
    Selection Parent Visual

    One common problem is communicating what elements are currently selected. Not a problem for slots or buttons, but what about various options in the settings menu, or in the creation menu? For these, I made a very simple component that enables a selection image whenever a child of that component is selected. This adds a little box around selected stuff.

    UI Navigation

    Unity has its own automatic navigation support, which is… okay, I guess. I however found that in 95% of cases I had to define my own navigation. Luckily this was pretty straight forward. My most common script was a parent script that would simply scan all children and make them vertically connected. Other more complex navigation was handled manually.

    Inventory Management had Navigation completely controlled manually, instead of relying on Unity’s navigation.

    UI Auto Scrolling

    Another complication you may run into with controller support is unity’s lack of auto scrolling – ie the player is navigating through a menu inside a scrollview, and selects an item outside of the view.

    I also made it so auto scrolling is only active when the current device is controller.

    You can see my Auto Scrolling script here, which has any input system specific logic stripped out.

    One important detail is the concept of “auto scroll at top”, which basically means “when you select the top item, force the scrollbar to go to the very top”. This is important for say, dialog in ardenfall – it ensures that when the player scrolls to the top option, it’ll auto scroll to reveal the dialog text. Otherwise you’d lose the ability to see that text!

    Glyphs

    Up until recently, I had avoided using any sort of icons for input, instead simply displaying the name of the input via text. This works fine for keyboard/mouse, but gets less friendly for controller. Thus, I decided to add support for icon glyphs, both as individual UI images and also as sprites within text.

    Glyphs need to change whenever switching between devices

    An example of Glyphs within text.

    Icon Lookup

    The core of Glyphs are the lookup tables. Each glyph set / controller has a map of input names and icons. Whenever an action is requested, I convert this action into an input (based on the currently active input method), and then present the icon.

    Naturally anywhere these icons are used also hook into a message to update themselves whenever the active input changes.

    Text Mesh Pro Spritemaps

    Text Mesh Pro can display sprites within text. This is done via a spritesheet. Every text element can have up to one spritesheet.

    Anywhere I want to display text with a icon, I simply include this: ‘input:jump’, for the input jump icon.

    Whenever I detect an input text, I will check if I already have a sprite in the sprite sheet for the active device. If not, I will grab it from the lookup, copy it over to the spritesheet, and then update the spritesheet.

     var glyphMetrics = new GlyphMetrics(
     glyphTexture.width * rect.width,
     glyphTexture.height * rect.height,
     0,
     glyphTexture.height * rect.height * 0.8f,
     glyphTexture.width * rect.width);
     var glyphRect = new GlyphRect(
     Mathf.FloorToInt(glyphTexture.width * rect.xMin),
     Mathf.FloorToInt(glyphTexture.height * rect.yMin),
     Mathf.FloorToInt(glyphTexture.width * rect.width),
     Mathf.FloorToInt(glyphTexture.height * rect.height));
     var spriteGlyph = new TMP_SpriteGlyph((uint)index, glyphMetrics, glyphRect, 1, index);
     glyphSpriteAsset.spriteGlyphTable.Add(spriteGlyph);
    
     var glyphCharacter = new TMP_SpriteCharacter(0, spriteGlyph);
     glyphCharacter.name = map.Item1;
     glyphSpriteAsset.spriteCharacterTable.Add(glyphCharacter);
    

    Adding a new sprite at runtime

    Side note: unless you want to support some sort of crazy dynamic icon stuff / steam input glyphs, I don’t see why you can’t just build these spritesheets during edit time. Just include a tool that packs them all together, and boom – no fancy requesting / hot updating of spritesheets.

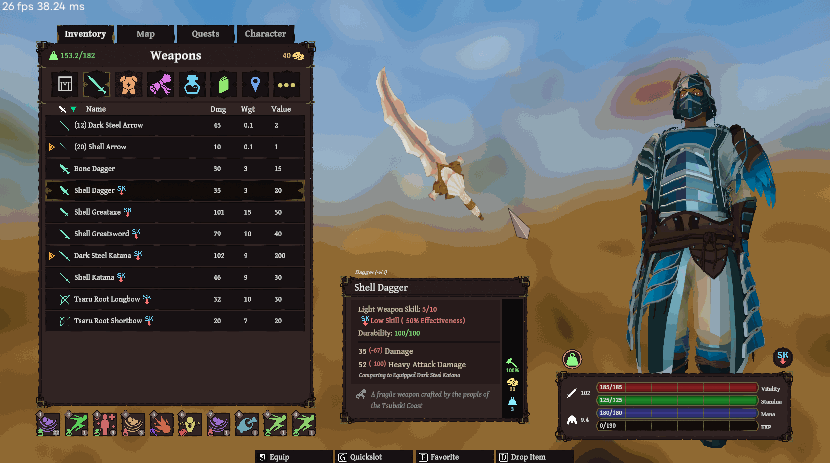
    Selectable Entry Widget

    A handful of places in my UI used dropdowns, which are very unfriendly for controllers. I replaced it with a simple selectable entry widget instead.

    It overrides the ‘OnMove’ method to ensure the user can switch between the entries by clicking the left/right navigation buttons. This does mean the widget doesn’t really work when there are widgets to the left and the right, but that’s life for ya.

    And speaking of that, here’s an exact example of that in Ardenfall. Since you can’t really navigate left and right, the user has to instead just navigate downwards to move to the next column. Ah, UX.

    Steam Onscreen Keyboard

    I also added support for Steam’s onscreen keyboard. It only appears in Steam’s Big Picture mode and on the Steamdeck. Not sure why it’s not supported in the normal mode, but it is what it is.

    To make it work, I had to make the text input have a parent that was a Selectable. This parent is what would be navigated to as you navigate throughout the menu.

    To actually edit the text input, you have to click ‘submit’. This overrides the selection to be the actual textbox now. This object has navigation disabled, and I also disable all other input (other than ‘back’ on controllers).

    And of course, when you select the actual text field, it automatically opens Steam’s onscreen keyboard. Easy enough.

    Input Suppression

    This is unrelated to UI, but shhh it’s still an interesting tidbit. I ran into an issue with Quick Looting – when you look at a container, a little menu pops up, letting you scroll and take items. The problem is with the scrolling. Naturally scrolling would use the Dpad, but other features are already bound to that, and due to remapping who knows what will be bound! I needed some way to stop any dpad related input from being triggered whenever this menu appeared.

    The solution was quite simple – scan the gameplay layer for any action with dpad in the binding path, and then whenever the menu appears, disable those actions. Clean and simple!

    Any actions bound to the Dpad need to be disabled when interacting with the quick loot menu.

    That’s It

    Implementing controller support UI in unity was grueling work, but it turned out both great for controller players AND keyboard/mouse users. If you’re planning on converting your existing UI to controller, plan for some pain, surprises, and unique solutions.

  • Making Unity Input System and Steam Input Get Along

    Note: After getting pretty close to completing the implementation of Steam Input into Ardenfall, I decided to forgo supporting it. I decided it wasn’t worth finishing, for now at least. Regardless, I think this post could still be useful for those who decide it’s worth it – specifically those who want “true” Steamdeck support with all of its bells and whistles.

    ~

    When implementing controller support into Ardenfall, I got a rude awakening once I uploaded it to Steam – nothing worked! It took a bit of effort to get everything working again, to get Unity Input System and Steam Input to get along.

    The Problem

    Steam Input is a feature that is built into all steam games. You cannot turn it off by default (although players can turn it off individually).

    When Steam Input detects a device it believes is not supported by your game (more info on that later), it will do a few things:

    1. If a non Xbox controller, it will disconnect it from Unity Input System, and reconnect it as a Steam Controller, on the steam side of things. At this point, Unity Input System has no idea this device exists.
    2. If an XBox controller, it will connect an additional Steam Controller device, resulting in two duplicate controllers. Unity Input System is aware of one, but not the other.

    If you never activate the Steam Input SDK (But have Steam API initialized), then the device seems to be still be taken over, but always reconnected as a xbox controller, regardless of source.

    What Steam Input Does

    The goal of Steam Input is to have a flexible action system that allows for players to add their own controller support to any game ever. It has a ton of nifty features.

    How it works for the developer: You create and register an action manifest file, which is a list of all the actions in the game. “jump”, “move”, and so on.

    You then create controller configurations that map each of these actions to a controller input.

    And then within unity or whatever engine you have, you check the controller for the action to see if it’s been pressed.

    This is great! Except, its not. Its terrible. This basically means steam controllers are in its own little world, and unity’s input system becomes worthless for these controllers. This becomes a problem when you consider all of the fancy input system logic, like navigation timings, and everything.

    But wait – what if we could create a virtual gamepad of sorts, plug that into unity input, then have steam actions trigger this virtual device?

    That is exactly what I did.

    Virtual Steam Device

    The goal here is: Steam Input -> Virtual Device -> Input System.

    I created a “Virtual Steam Action Device”, where each button/value is an action. Jump, Look, Move.

    You can see my implementation here.

    Then I map this virtual device to my input settings.

    And then during runtime, I go through each steam action, and plug the value into the device.

    
                if (SteamManager.Initialized && currentDeviceType == InputDeviceType.GamepadSteam)
                {
                    UpdateSteamVirtualButton("uiBack");
                    UpdateSteamVirtualButton("uiSelect");
                    UpdateSteamVirtualButton("uiAction");
                }
    ....
    
            private void UpdateSteamVirtualButton(string controlId)
            {
                if(!digitalActionHandles.TryGetValue(controlId, out var handle))
                {
                    Debug.LogError($"InputSystem :: Expected steam action {controlId}, but it does not exist");
                    return;
                }
                
                var state = SteamInput.GetDigitalActionData(CurrentSteamGamepad, digitalActionHandles[controlId]);
                virtualSteamGamepad.SetButton(controlId, state.bState == 1);
            }

    You will of course need to then set up your action manifest file with all the actions defined. Check out Steam’s Documentation on that.

    The benefits to this approach are pretty big: Everything, from non steam controllers, to mouse and keyboard, to steam controllers, goes through the unity input system. This means VERY little additional work. It’s like magic!

    Originally I intended to have a single action set and all bindable possibilities at once. While you can bind multiple actions to a button, you cannot bind multiple actions to a joystick. So I ended up using a combination of layers and action sets to get this working.

    Determining Active Device

    Generally you want to keep track of the active device. In my case, I use it for glyphs, and some UI logic (I show selection boxes when a controller is active, but hide it when using a mouse).
    To do this, every frame I:

    1) Check if current device is disconnected.
    2) If either disconnected or I’ve received input from any steam controller this frame (I loop each action and see if the value is different), then set active device to this steam controller.
    3) If either disconnected or I’ve received input from any unity gamepad this frame, then set active device to this gamepad.
    4) If either disconnected, there is no active device, or I’ve received input from mouse or keyboard, then set active device to mouse and keyboard.

    Convincing Steam to NOT use Steam Input

    For me, at least by default, I’d rather not use steam input at all unless necessary. I have my own remapping, its cool and doesn’t require extra knowledge.
    So here’s how to make your XBox / Playstation controllers to NOT use Steam Input.

    • In the Steamworks ‘Steam Input’ page, make sure the controller is NOT toggled on in ‘Opt Controllers into Steam Input’.
    • In the Steam Store ‘Basic Info’ page, define support for controllers using the ‘Controller Support Wizard’. Make sure to say you fully support the controllers you wish to not have Steam take over. Note: Steam says one of the requirements for.
    • Once you upload the game, check out the result in the steam overlay. It should say your controller is fully supported. If it says partial, you need to make sure you said the controllers are fully supported in the wizard.

    Glyphs

    Glyphs aren’t too bad. For Ardenfall there’s two types of glyphs – RawImage and Spritesheet glyphs. The former is simply displaying a single icon somewhere in the UI, and the latter is a more complex spritesheet that is displayed within TextMeshPro text. The spritesheet is built at runtime, either collecting all icons for the mouse and keyboard, a non steam controller, or steam controllers. The former just uses local images mapped to key codes, and the latter relies on Steam’s glyph requester.

    Since there’s no way to hook into the player changing actions, I manually read glyph paths, and compare to my cached ones. If any change, then I update my glyphs. Hacky, but that’s the name of the game when dealing with Steam input.

    Limitations

    Remapping

    You cannot use Unity Input System remapping for these steam controllers. This is because the controller remapper is remapping gamepad stuff, and steam input isn’t using a unity gamepad. For me, the solution was to simply detect that the active device is a steam device, and put a warning that the remapping doesn’t work, you’ll need to remap in the steam input settings, or disable steam input and restart the game.

    Action Map Resets

    Unlike with Unity Action Maps, Steam Input System does not reset controller state when switching Action Sets. This introduces problems, such as this example:

    1. User presses the ‘Start’ Key, which is mapped to ‘Open Inventory’. The inventory opens.
    2. When the inventory opens, and the action map is changed to ‘UI”
    3. The ‘Start’ Key is now mapped to ‘Back’. The start button is still being held down, so now its counted as pressing back!

    My solution was whenever a action set would change, I would check the state of all buttons, and add any that are pressed down to a list. I would then tell unity input that these buttons are no longer down. Then whenever I update the virtual device, if the input value is pressed down, I only update the input system state once an input value is tracked as up.

    Other Findings

    • If you initialize the steam SDK, but don’t run the game through steam itself (ie just run the executable) and steam thinks your controller isn’t supported, then it will cause your controllers to just… not work. So for local dev builds, you have to upload the game and test it within steam, or disable the steamworks sdk initialization.
    • If the player disables or enables steam input from the overlay menu while playing, it will not resolve itself (steam devices disconnect, but never reconnect as non steam devices). I haven’t found a solution for this. There’s also no way as far as I know to detect that the user has turned on and off steam input.

    Resources

    And That’s That

    Hopefully this post sheds some light on the mysteries of Steam Input. I think there’s a pretty good reason so few games officially support Steam’s Input System – it is pretty detached from existing input systems, has odd quirks, and can be tough to develop with, especially action manifest caching and other spooky stuff.

    And that’s it! Bye.

  • Ardenfall’s Unity Build Tooling

    Being the only one making builds on the project, there has been little need for a build server. Someday I’ll set one up, but for now I just run all builds locally. That doesn’t mean I don’t have a few tools, and I figured they were interesting to post as my first post on this little blog.

    Cell Batcher

    My world is split into maps (interior and overworld) and my maps are split into cells. A lot of local (not source control) data is baked for both development and build uses. Navmesh and occlusion data, cell previews (used for the ingame map and an editor scene loader), distant cells (simplified prefabs of each cell), and so on.

    I can target all cells, cells loaded in the scene editor, currently selected cells in the cell selector window, or bookmarks (predefined lists of cells).

    The World Panel Tool is used to load cells in the editor, but can be used to select certain cells to batch / build in a pinch.

    Currently this is a VERY rudimentary part of the build pipeline – relying on either baking everything (takes ages) for every build, or just manually remembering what data needs to be updated.

    I plan on heavily improving this in the future. Storing separate data for different build profiles (IE demo vs release vs development), and tracking when data needs to be automatically updated (ie detecting a scene has been altered and invalidating certain data) are key additions I’d like to add eventually.

    Build Profiles

    Each build profile has a configuration (steam appid, analytics info, etc), as well as allows for asset stripping certain directories. I can also define what cells are packed by default.

    Builder

    The actual build tool gives a handful of helpful options.

    The most interesting is the Pack Cells feature. I can pack all scenes, certain bookmarks, selected cells, and so on. This makes it very easy to only build areas I care about – for the demo I just pack certain cells, and for a development build I may just pack a single cell I want to test!

    There’s also various development flags and other standard build flags.

    Build versions are by default automatically generated, but I can force a certain build version if I desire.

    Steam Uploader

    I’ve also made a little tool to automate steam uploads. It simply hooks into Steam’s

    Source Control Tooling

    While not quite related to build tooling, the Source Control tooling is tangentially related. It is also a fun example of building something fancy that ends up being unnecessary.

    A few years ago, I built this very fancy cell git tool, that detects cell data being modified via git, and allowing for certain cells to be easily discarded, staged, unstaged, and so on.

    After a few months of seeing the level designers rarely push their work (even with my nagging), I considered an alternative: a single button to stage everything currently loaded.

    Think of the workflow the devs are doing – they are loading some cells, and doing work. Thus, a button that just stages the loaded cells is really all they need to do! Naturally they need to also push other assets they may have altered – prefabs, materials and so on. But my tool was never meant to resolve that anyways! Lesson learned.

    I will still use the full tool every once in a while, but not enough to make it worth it. It’s usually much faster to just stage selected or loaded cells, then discard anything in staging.

    End

    Well, that’s it for build tooling. Nothing groundbreaking, but still some fun features that makes my life easier. The steam tool in particular has been a huge help! I hope something here gives you an idea for your own project.